Starting with a GCP instance, and a firewall rule to allow incoming traffic on port 8080.
By default, Jenkins runs on port 8080. Make sure this port is open in your Google Cloud firewall:
- Go to the VPC Network section in the Google Cloud Console.
- Click on “Firewall rules” and then “Create firewall rule.”
- Set the following values:
- Name: Allow-jenkins
- Targets: All instances in the network
- Source IP ranges: 0.0.0.0/0
- Protocols and ports: tcp:8080
- Click “Create.
We then curl git and JDK:
sudo apt update
sudo apt install openjdk-17-jdk -y
We then modify bashrc
echo "export JAVA_HOME=$(dirname $(dirname $(readlink -f $(which java))))" >> ~/.bashrc
echo "export PATH=$JAVA_HOME/bin:$PATH" >> ~/.bashrc
source ~/.bashrc
install GPG key
curl -fsSL https://pkg.jenkins.io/debian/jenkins.io-2023.key | sudo tee /usr/share/keyrings/jenkins-keyring.asc > /dev/nulladd jenkins
echo deb [signed-by=/usr/share/keyrings/jenkins-keyring.asc] https://pkg.jenkins.io/debian-stable binary/ | sudo tee /etc/apt/sources.list.d/jenkins.list > /dev/null
Install
sudo apt install jenkins -ysudo systemctl start jenkins
sudo systemctl enable jenkinsOpen a web browser and navigate to http://<your-instance-external-ip>:8080.
You will be prompted to unlock Jenkins. To get the initial admin password:
sudo cat /var/lib/jenkins/secrets/initialAdminPasswordCopy the password from the terminal and paste it into the “Administrator password” field.
Follow the on-screen instructions to complete the setup, including installing recommended plugins and creating your first admin user.
Steps to Tie Jenkins to a DagsHub Repository
Install Jenkins Plugins:
- Install the necessary plugins in Jenkins:
- Git Plugin
- GitHub Plugin
- Pipeline Plugin (if you want to use Jenkins pipelines)
Generate DagsHub Personal Access Token:
- Log in to your DagsHub account.
- Navigate to your account settings and generate a personal access token. This token will be used to authenticate Jenkins to access the DagsHub repository.
Add Credentials in Jenkins:
- Go to Jenkins Dashboard.
- Click on “Manage Jenkins” -> “Manage Credentials”.
- Select the appropriate domain (e.g., Global domain).
- Click on “Add Credentials”.
- Choose “Username with password” as the kind.
- For the “Username”, use your DagsHub username.
- For the “Password”, use the personal access token generated in the previous step.
- Provide an ID and Description for these credentials and save them.
Create a Jenkins Job:
- Go to Jenkins Dashboard.
- Click on “New Item”.
- Enter a name for your job and select “Freestyle project” or “Pipeline” depending on your needs.
Configure Source Code Management:
- In the job configuration page, scroll down to the “Source Code Management” section.
- Select “Git”.
- In the “Repository URL” field, enter the URL of your DagsHub repository (e.g.,
https://dagshub.com/Omdena/NorthCarolina_CameroonChapter_AngusIssues.git). - Select the credentials you added earlier from the “Credentials” dropdown.
- Specify the branch you want to build (e.g.,
main).
Configure Build Triggers (Optional):
- If you want Jenkins to automatically trigger builds on repository changes, configure the build triggers. For example, you can use “Poll SCM” or “GitHub hook trigger for GITScm polling”.
Configure Build Steps:
- Add the necessary build steps. This might include compiling code, running tests, or deploying applications.
- For a simple example, you can add a shell script build step to echo a message.
Save and Build:
- Save the job configuration.
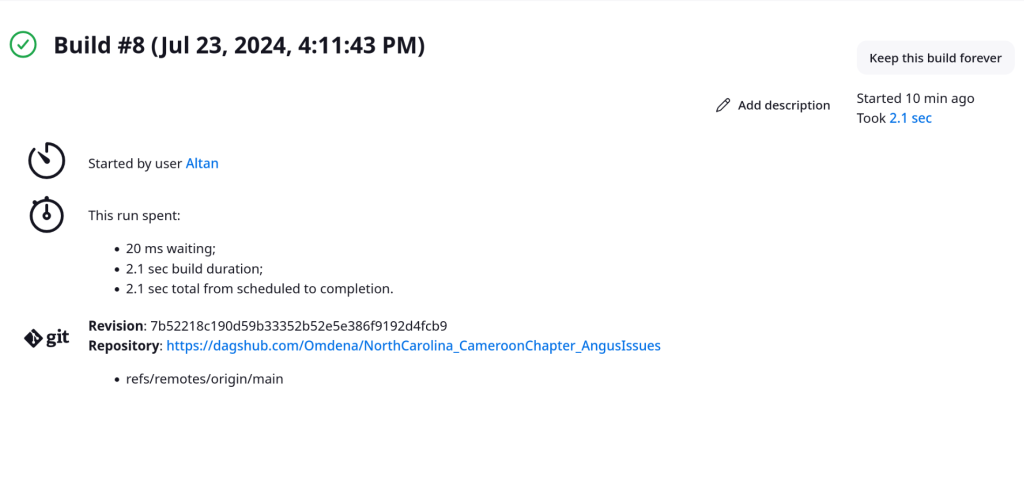
- Manually trigger a build to ensure that everything is set up correctly.
Example Pipeline Script (Jenkinsfile)
If you prefer using a Jenkins pipeline, you can create a Jenkinsfile in your repository with the following content:
YOUR _CREDENTIALS_ID should be a API token from Dagshub which you set to login secret as your username for dual factor dagshub login
This file should be in the main branch of your Dagshub Repository as Jenkinsfile
pipeline {
    agent any
    stages {
        stage('Checkout') {
            steps {
                git url: 'https://dagshub.com/Omdena/NorthCarolina_CameroonChapter_AngusIssues.git',
                    credentialsId: 'YOUR_CREDENTIALS_ID',
                    branch: 'main'
            }
        }
        stage('Build') {
            steps {
                echo 'Building...'
                // Add your build steps here
            }
        }
        stage('Test') {
            steps {
                echo 'Testing...'
                // Add your test steps here
            }
        }
        stage('Deploy') {
            steps {
                echo 'Deploying...'
                // Add your deploy steps here
            }
        }
    }
}

